Protecting home upholstery and fabrics from accidental liquid spills is a top priority for anyone who values their investment. After all, a simple coffee spill or pet accident can ruin a brand-new sofa or mattress in a matter of seconds. This is why hydrophobic fabric protectors (water repellents) have become the ultimate allies in modern home maintenance.
However, a very common mistake in the DIY culture is believing that the job is done as soon as you release the sprayer trigger. If you do not respect the science behind the product, your protection will fail during the very first accident.
The true secret to professional-grade fabric sealing relies on a strict three-phase protocol: proper preparation, precise cure time, and the final effectiveness test.
In this detailed guide, you will understand how these elements work together to ensure that your investment of time and money delivers the maximum possible durability.
Disclaimer: As an Amazon Associate, FixByMyself earns from qualifying purchases made through links in this post at no additional cost to you.
What is a Hydrophobic Fabric Protector and How Does It Work?
To understand the importance of proper application, we need to look at the physics of the product. Hydrophobic protectors do not create a stiff, suffocating plastic layer over the fabric. The true engineering behind them works at a microscopic level.
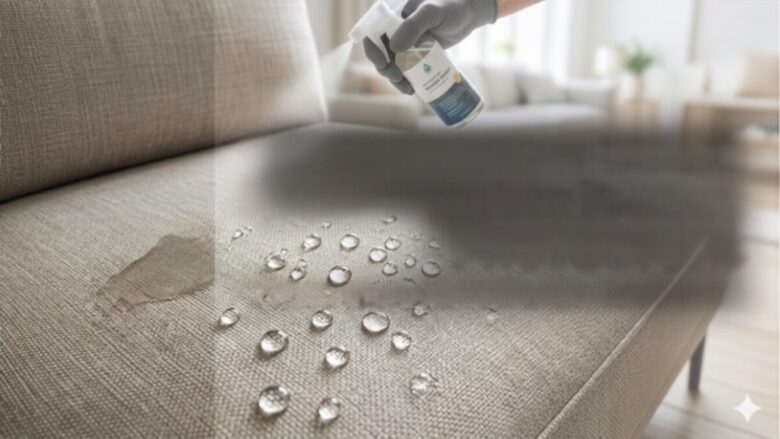
The product’s nanoparticles penetrate and anchor themselves individually onto each fiber of the fabric, altering the material’s surface tension. When a liquid comes into contact with a protected fabric, it cannot spread or be absorbed. Instead, the liquid is repelled, forming perfect beads that float on the surface.
For this molecular anchoring to happen perfectly, the product requires strategic application and an immaculate surface.
👉 [Click here to check the best hydrophobic fabric protectors on Amazon]
Phase 1: Surface Preparation and Technical Application
Before pulling the spray trigger, the fabric must undergo a rigorous preparation process. Any dirt residue or moisture creates an invisible barrier that prevents the protector from bonding with the fiber, drastically reducing the lifespan of the protection.
1. Deep Vacuuming and Cleaning
The first step is to remove all dust, hair, and solid particles. Use a powerful vacuum cleaner across the entire surface. If the upholstery has stains or deep-seated dirt, it must be thoroughly cleaned and sanitized beforehand.
2. Absolute Dryness
The fabric must be 100% dry before application. Applying the product to fibers that are even slightly damp will cause the protector to be rejected by the fabric. If necessary, use fans to speed up the drying process.
3. Spray Application Technique
Working in a well-ventilated area, shake the product well. Maintain a distance of 6 to 8 inches between the sprayer and the fabric. Apply the spray using steady, overlapping crisscross motions (horizontally and then vertically) to ensure uniform coverage. Do not oversaturate the fabric; two thin, crossed coats protect much better than one heavy, localized layer.
💦 [Click here to check this professional spray bottle for effectiveness testing]
Phase 2: The Critical Factor — Understanding Cure Time
Cure time is the period during which the product’s solvent evaporates, allowing the protective resins to complete their chemical fusion with the fabric. Ignoring this step and using the furniture prematurely breaks the still-weak chemical bonds, ruining the entire application process.
We need to divide this drying process into two fundamental stages:
- Partial Cure (Dry to the Touch): This typically happens between 2 to 4 hours after application. At this point, the solvent has evaporated and the fabric feels dry to the touch. However, the protective barrier is still sensitive and unstable. No weight or friction should be applied to the furniture yet.
- Total Cure (Complete Shielding): This takes 24 to 48 hours to fully consolidate. This is where the magic of nanotechnology is completed. Only after the total cure are the fibers fully shielded against liquids and ready for daily use.
Factors That Alter Cure Time
The weather and the surrounding environment dictate the rate of solvent evaporation.
| Weather Condition | Estimated Cure Time | Practical Recommendation |
| Hot and Dry Days | 24 Hours | Ideal scenario. Keep doors and windows open to allow air to circulate freely. |
| Rainy and Humid Days | 48 Hours (or more) | High air humidity delays evaporation. If possible, use a dehumidifier or a fan in the room. |
| Closed Environments | 36 to 48 Hours | Without airflow, the solvent takes longer to dissipate. Leave fans running pointed at the upholstery. |
Phase 3: How to Safely Perform the Effectiveness Test
You should never assume the upholstery is protected just because you sprayed the product. The effectiveness test is your guarantee that the protocol was followed correctly and that no “blind spots” were left without product.
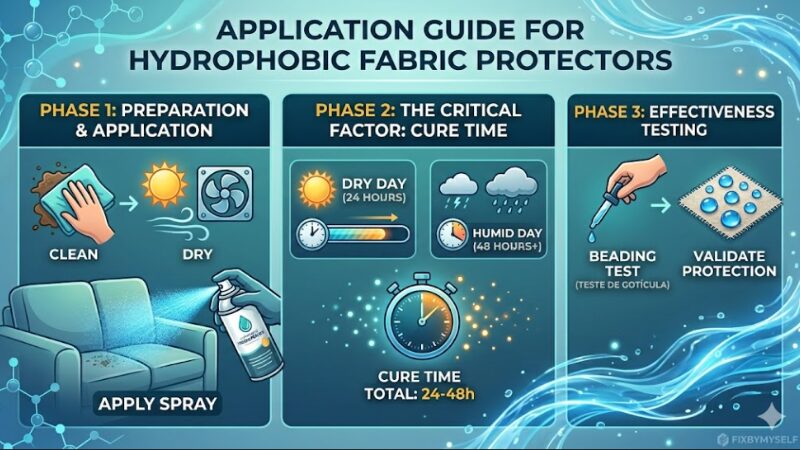
Follow this systematic and safe step-by-step process to validate your application:
- Wait for the Total Cure: Never perform the test before at least 24 to 48 hours have passed since the application.
- Choose a Discreet Area: Conduct the first test on a less visible part of the upholstery (such as the side or back of a cushion).
- The Beading Test: Using your fingertips or a dropper, place just two or three drops of clean water onto the fabric.
- Analyze the Behavior:
- Passed: If the water drops turn into perfect spheres that roll off or sit on top of the fabric without wetting the fiber, your fabric sealing was a total success.
- Failed: If the droplet flattens out and sinks into the fabric after a few seconds, it means the fiber absorbed the liquid. You will need to apply a second coat of the product (respecting the entire cure time all over again).
Conclusion
Hydrophobic fabric protection is a fantastic preservation and DIY home maintenance technique, but it requires patience and respect for chemical processes. Rushing to use a sofa before the total cure time is the reason behind 90% of application failures in the market. Follow the three phases of the protocol, perform the beading test, and ensure your furniture stays protected for much longer.
Now we want to hear from you: Have you ever tried protecting your furniture at home only to have the product fail? Do you have any questions about the application method or drying times? Leave a comment below and let’s talk about it!